
7 Tips for Buying a Black Marble Threshold

Time:2026-11-09 Author:Aria
0%

A doorway threshold takes more wear than its small size suggests. Shoes grind grit across its surface, while water can collect beside the door. A Black Marble Threshold can create a crisp transition between rooms, but appearance alone is a weak buying test. Marble varies in veining, shade, porosity, and finish, even within one batch. Small details matter.

The U.S. Geological Survey’s Mineral Commodity Summaries 2024, under “Dimension Stone,” tracks industry production and trade. It offers useful market context, but it does not certify an individual threshold’s quality. For product specifications, ASTM C503/C503M sets requirements for marble dimension stone. ASTM test methods also address properties such as water absorption and flexural strength. Ask sellers for relevant test results, not broad claims about “premium” stone. A sample can look perfect and still tell you little about the slab’s consistency.

Measure the opening carefully, including the finished floor height and door clearance. Then check thickness, edge profile, finish, sealing guidance, and whether the piece is cut to size. Request photographs in natural light, plus a sample when possible. Look closely at the veining. Does it continue across the visible face? For a wet entry, ask how the finish handles moisture and cleaning. I would not assume polished marble is the safest choice everywhere; the right decision depends on traffic, water exposure, and maintenance habits. The tips ahead focus on those practical checks, so the stone looks considered after installation—not just impressive in a showroom.
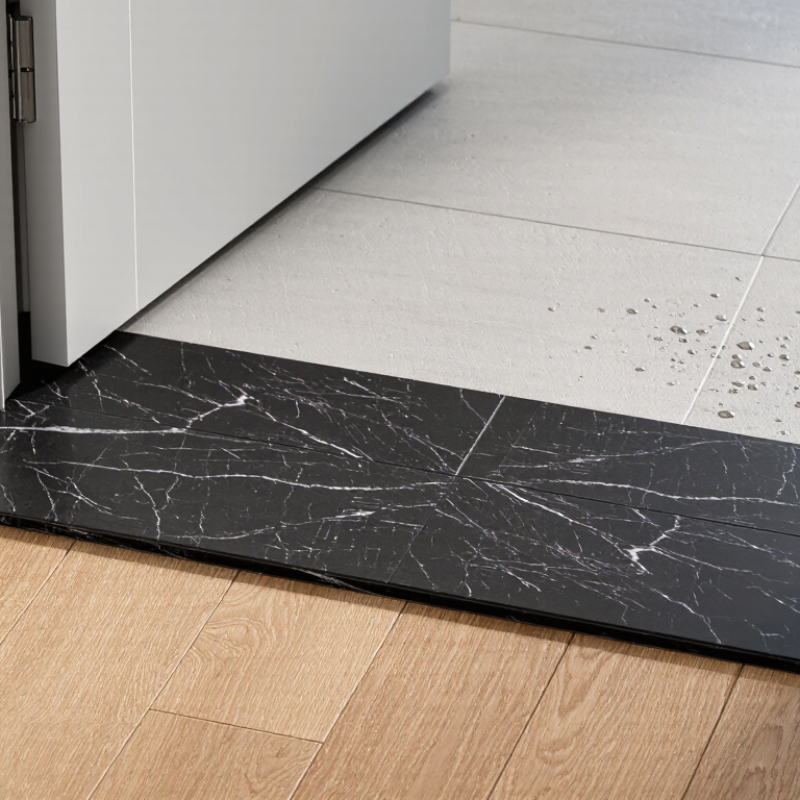
7 Tips for Buying a Black Marble Threshold

Determine the Threshold’s Location, Purpose, and Required Dimensions

Before choosing a black marble threshold, identify exactly where it will sit. A bathroom doorway, shower entrance, and room-to-room transition face different conditions. Note whether the stone will separate wet and dry flooring, cover an exposed edge, or simply mark a doorway. That purpose affects its profile, thickness, and finish.

Measure the opening from jamb to jamb at the floor, then check the width at both ends and the center. Walls and flooring are not always perfectly square. Measure the threshold’s front-to-back depth, including any flooring it must cover, and compare its height with both adjoining surfaces. A raised edge may catch a toe; a piece that is too low may leave a gap. Check door clearance, too. A door sweep can scrape a threshold that looks fine on paper. Small details matter.

For a shower or other wet area, ask a qualified stone fabricator about suitable edge shaping, water exposure, and slip resistance. Polished black marble can become slippery when wet, and dark stone may show water spots or dust more readily. Requesting a sample can reveal color variation under your actual lighting. I would recheck every measurement before ordering; it feels tedious, but a second check is cheaper than a poorly fitting cut.

Compare Black Marble Types, Finishes, and Slip Resistance

Tip 1: Compare black marble samples in the room where the threshold will sit. Some stones look nearly solid, while others show pale veins or cloudy patches. Lighting changes their appearance, too. Set a sample beside your floor tile and inspect it in daylight and under evening lights. Small differences matter.

Tip 2: Compare finishes, not just color. Polished marble reflects light and feels smooth, but water can make it slippery. Honed finishes are less glossy and may offer more grip, though texture alone does not guarantee safe footing. Ask for slip-resistance information tested under wet conditions. A dry showroom floor is not enough.

Tip 3: Think about the threshold’s actual use. A bathroom doorway may face splashes, soap residue, and frequent cleaning; an interior transition may stay mostly dry. Check care guidance and avoid cleaners that could damage the stone’s finish. Request a sample with the same finish you plan to buy. I once underestimated how different black stone looked beside warm-toned tile, so bring both materials together before deciding. Also confirm the piece’s thickness and edge profile will meet the adjoining floor cleanly.

Inspect Color, Veining, Edges, and Surface Quality

A black marble threshold can shift from charcoal to near-black under different lighting. Inspect it in daylight and under warm indoor bulbs. Check the face from several angles; a damp-looking patch may be natural variation, not a stain. Natural stone is rarely perfectly consistent. Look closely. Compare the veining across the full piece, not just its best-looking corner. Fine, continuous lines often appear calmer than abrupt, crowded streaks, but preference is personal. Watch for cracks that cross the slab or reach an edge. A hairline mark can be hard to judge, so ask the supplier to identify it before purchase.

Edges take daily knocks from shoes, luggage, and cleaning tools. Check that they are even, smooth, and free of chips, especially at the corners. If the threshold has a bevel, inspect its width along the whole length. Run a clean fingertip over the edge; rough spots may signal poor finishing. Then examine the surface under angled light. It can reveal scratches, dull patches, or shallow pits that overhead lighting hides. A polished finish reflects more light, while a honed finish looks softer and may show marks differently. Ask how the stone was sealed and what care it needs. It is easy to focus on dramatic veining and miss a small flaw near the end. That judgment deserves a second look.

Check Compatibility with Flooring and Installation Requirements

A black marble threshold can look seamless, but color alone does not tell you whether it will suit the floor. Compare its thickness with both finished flooring surfaces. A height mismatch can catch toes or leave an awkward gap. Check the doorway width, swing, and transition profile before ordering. Measure twice. Real floors are rarely perfectly level.

Tip: Ask the stone supplier for the specific material’s ASTM C97/C97M test results. This standard measures water absorption by mass and bulk specific gravity; values help you assess how the stone may perform in a damp entry or bathroom. The Natural Stone Institute’s Dimension Stone Design Manual also advises matching stone selection to the application. Don’t assume every black marble behaves alike.

Confirm how the threshold will be supported and bonded. Tile, timber, and resilient flooring may need different transition details, and the installer should check the substrate for flatness and moisture. Leave the movement space required by the adjacent flooring system; rigidly pinning a stone strip can invite cracking. Dry-fit the piece first, including at the jambs. A slightly imperfect cut may still be visible, so agree on edge finish, joint width, and final height with the installer before setting it.

7 Tips for Buying a Black Marble Threshold - Check Compatibility with Flooring and Installation Requirements

Tip What to Check Practical Guidance Installation Consideration
1. Match the finished floor heights Measure the finished floor surfaces on both sides of the doorway, including tile, underlayment, and setting materials. Choose a threshold thickness and profile that suit the height difference. A sloped or beveled edge can help reduce an abrupt transition. Account for the mortar bed when calculating the installed height; check that the transition will not create a trip hazard.
2. Confirm the width and doorway fit Measure the opening at several points and check the depth needed to cover the joint between floor finishes. Allow for walls that are not perfectly square and verify that the selected length can be cut to fit without leaving exposed gaps. Dry-fit the piece before bonding. Use appropriate stone-cutting equipment and protect the polished surface while cutting.
3. Check compatibility with both flooring materials Identify the adjoining floors, such as ceramic tile, porcelain, wood, vinyl, or carpet, and check how each handles movement and moisture. Make sure the threshold covers the transition while allowing any required movement gap, particularly next to wood or floating floors. Do not rigidly bridge an expansion gap if the flooring instructions require it to remain open; use a suitable transition detail.
4. Inspect the stone and its finish Check the piece for cracks, chips, uneven edges, surface defects, and differences in veining or color. Compare the actual piece with nearby flooring under the room’s lighting. A polished surface can be slippery when wet. Select an edge profile appropriate for the location, and consider a less slippery finish where wet-foot traffic is expected.
5. Choose a suitable setting material Confirm that the mortar or adhesive is approved for natural stone, the substrate, and the installation conditions. Follow the stone and setting-material instructions; test compatibility if the stone’s composition or appearance is uncertain. Install on a clean, sound, flat, and adequately supported base. Avoid voids beneath the threshold that could lead to cracking.
6. Plan for water exposure and maintenance Consider whether the threshold will be near a shower, exterior entrance, or other area exposed to water. Marble can absorb liquids and may be sensitive to acids. Use a stone-safe, pH-neutral cleaner and follow care guidance for the specific stone. Use appropriate waterproofing and drainage details in wet areas. Apply sealer only if recommended for the stone and installation.
7. Verify site and safety requirements Check local requirements and the product’s suitability for indoor or outdoor use, expected traffic, and temperature conditions. Do not assume every marble threshold is suitable for exterior or freeze-thaw exposure; confirm the stone’s specified performance. Follow applicable accessibility and building requirements, and ensure the installed surface is stable, securely bonded, and free of sharp edges.

Compare Costs, Sealing Needs, and Long-Term Maintenance

A black marble threshold can look understated, but its price includes more than the stone. Compare quotes for the slab, cutting, edge finishing, delivery, installation, and any removal of the old threshold. A custom shape or polished edge can raise fabrication costs. Ask whether the quote includes fitting and sealing; vague estimates make comparisons difficult. I would not choose by color alone.

Tip: Bring home a sample. Check it beside your floor in daylight and warm indoor light. Dark stone can show dust and pale water marks more clearly than expected.

Sealing needs depend on the marble, its finish, and how often the doorway gets wet. Ask the supplier for care instructions, and test water absorption as directed rather than assuming every stone needs the same schedule. Sealer can reduce staining, but it will not stop marble from etching when exposed to acidic cleaners or spills.

Use a pH-neutral stone cleaner, wipe up water, and avoid abrasive pads. Polished marble may also become slippery when wet, so consider a honed finish in a frequently damp area. Maintenance is modest, but not zero; that is easy to underestimate.

FAQS

How should I measure a black marble threshold?

Measure jamb to jamb at floor level, then check both ends and the center. Include front-to-back depth, floor heights, and door clearance. Recheck everything.

What should I consider for a bathroom or shower threshold?

Ask a qualified stone fabricator about edge shaping, water exposure, and slip resistance. Polished marble may become slippery when wet. Take care.

How can I check the marble’s color and veining?

View a sample in daylight and warm indoor light. Compare the full piece from several angles; dark stone can look different under each light.

What surface flaws should I look for?

Check for cracks, chips, scratches, dull patches, and shallow pits. Angled light can reveal marks that overhead lighting hides. Look closely.

Is a polished or honed finish better?

Polished marble reflects more light, while honed marble looks softer. A honed finish may suit a frequently damp area, but compare samples first.

What costs should I include when comparing quotes?

Check whether the quote covers stone, cutting, edge finishing, delivery, installation, and sealing. Custom shapes can cost more. Vague estimates are hard to compare.

Does black marble need sealing and special care?

Sealing needs vary by stone, finish, and water exposure. Follow supplier instructions, use a pH-neutral stone cleaner, and wipe up water promptly.

Can sealing prevent all stains or marks?

No. Sealer can reduce staining, but acidic cleaners and spills may etch marble. Dust and pale water marks may also show more clearly. I might underestimate that.

Conclusion

Choosing a Black Marble Threshold starts with understanding where it will be installed, what purpose it serves, and the exact dimensions needed for a proper fit. Consider how the threshold will meet surrounding floors and whether its surface will be exposed to moisture or frequent foot traffic. Compare marble types and finishes, paying close attention to slip resistance, color, veining, edge details, and overall surface quality. These features influence both the appearance of the finished space and how well the stone suits its intended use.

Before purchasing, confirm that the threshold is compatible with the existing flooring and that the installation requirements can be met. Compare the total cost, including any preparation or fitting needs, and learn whether the marble requires sealing. Regular care and appropriate maintenance can help preserve its appearance over time, making it easier to choose a threshold that balances style, practicality, and long-term upkeep.


Aria

Aria

Aria is a dedicated marketing professional with a deep passion for innovative strategies and a keen understanding of our company's product offerings. With a wealth of experience in the industry, Aria excels at crafting engaging content that highlights the unique features and benefits of our......